> ## Documentation Index
> Fetch the complete documentation index at: https://docs.senseaudio.cn/llms.txt
> Use this file to discover all available pages before exploring further.
# Codex CLI
> 在 Codex CLI 中使用 S2 模型进行 AI 编程
## 安装 Codex CLI
如果你的设备尚未安装 Node.js,请先安装 Node.js 18 及以上版本,再执行以下命令安装 Codex CLI。
你可以访问官网安装,也可以通过命令安装:
```bash macOS (Homebrew) theme={null}
brew install node
```
```bash Ubuntu / Debian theme={null}
sudo apt update && sudo apt install -y nodejs npm
```
```powershell Windows (winget) theme={null}
winget install OpenJS.NodeJS.LTS
```
如果你更习惯图形界面安装,也可以访问:
```bash macOS / Linux - 安装 Node.js theme={null}
https://nodejs.org/
```
```powershell Windows - 安装 Node.js theme={null}
https://nodejs.org/
```
安装完成后,执行以下命令安装 Codex CLI:
```bash macOS / Linux theme={null}
npm install -g @openai/codex@latest
```
```powershell Windows theme={null}
npm install -g @openai/codex@latest
```
更多安装细节与进阶用法请参考 [ codex 官方文档](https://developers.openai.com/codex)。
## 配置 SenseAudio API
**还没有 API Key?** 请先订阅 [Token Plan](https://senseaudio.cn/tokenplan),然后在控制台 **账户管理 → Token Plan** 创建专属 API Key。套餐额度用尽或达到限制后,可开启 **Extra Usage**,超出部分将自动按量计费、从账户余额扣费。
根据你的系统编辑对应位置的 `auth.json`,填入你的 SenseAudio API Key:
```txt macOS / Linux theme={null}
~/.codex/auth.json
```
```txt Windows theme={null}
%USERPROFILE%\\.codex\\auth.json
```
```json theme={null}
{
"OPENAI_API_KEY": ""
}
```
根据你的系统编辑对应位置的 `config.toml`:
```txt macOS / Linux theme={null}
~/.codex/config.toml
```
```txt Windows theme={null}
%USERPROFILE%\\.codex\\config.toml
```
```toml theme={null}
model_provider = "senseaudio"
model = "senseaudio-s2"
model_reasoning_effort = "xhigh"
disable_response_storage = true
trust_level = "trusted"
[model_providers.senseaudio]
name = "senseaudio"
base_url = "https://api.senseaudio.cn/v1"
wire_api = "responses"
requires_openai_auth = true
```
```bash macOS / Linux theme={null}
codex
```
```powershell Windows theme={null}
codex
```
运行效果如下:
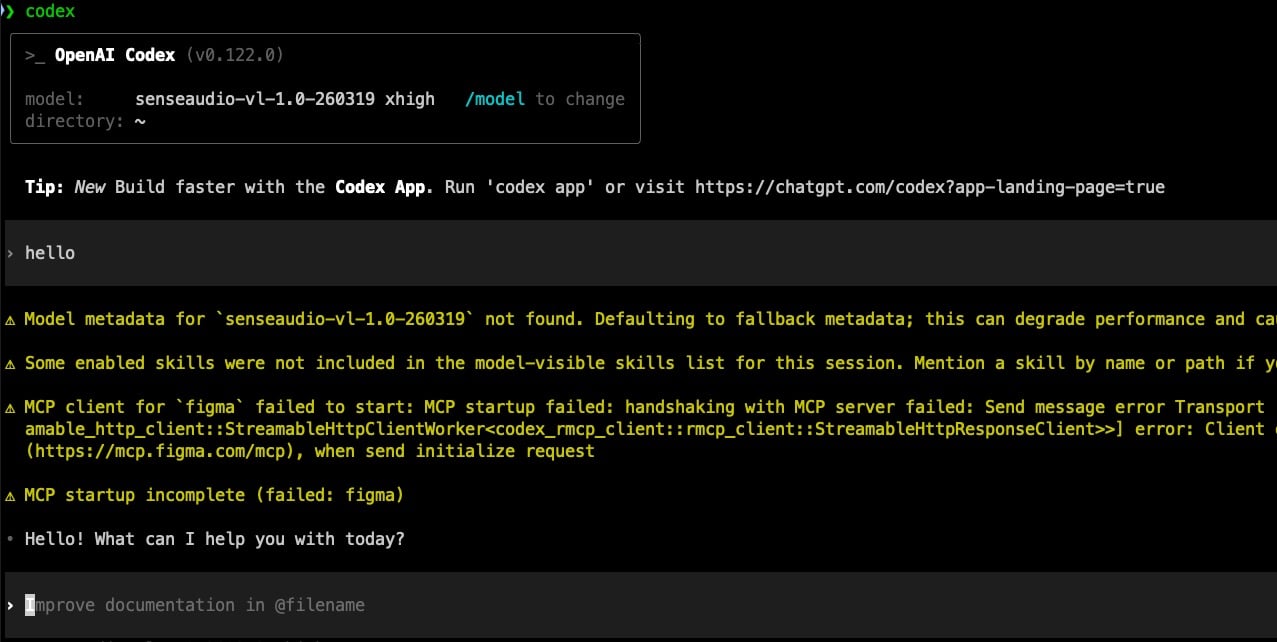 Codex CLI 会从 `auth.json` 中读取 `OPENAI_API_KEY`,并按 `config.toml` 中的 `base_url` 和 `wire_api = "responses"` 转发到 SenseAudio 接口。
## 相关资源
订阅、限额、切换、开票等问题解答。
Codex CLI 会从 `auth.json` 中读取 `OPENAI_API_KEY`,并按 `config.toml` 中的 `base_url` 和 `wire_api = "responses"` 转发到 SenseAudio 接口。
## 相关资源
订阅、限额、切换、开票等问题解答。